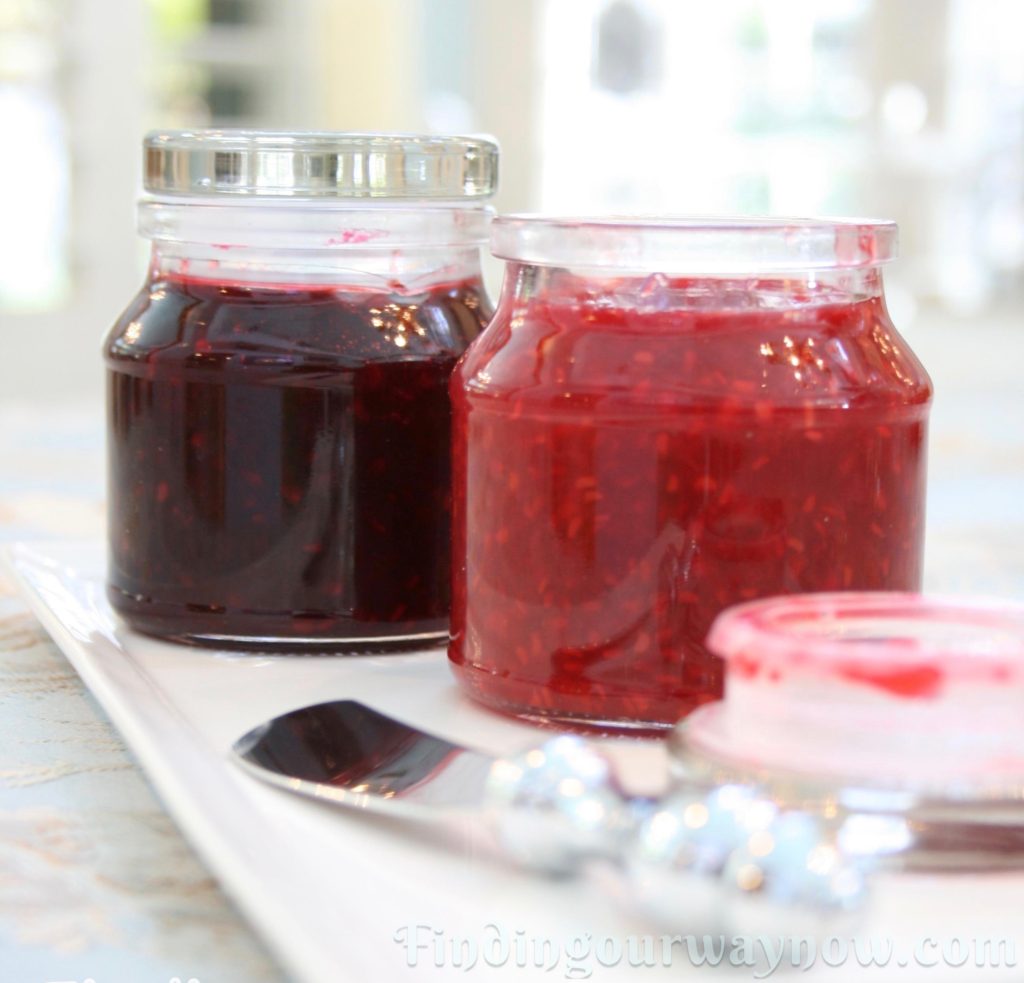
I’m on a roll with jam, marmalade, and making preserves. The fact that my Homemade Berry Jam is the simplest thing ever is a good reason to love this recipe. All I can say is once you’ve tasted your own, you’ll be hard pressed to buy it at the grocery store again.
My very first experience with making this jam was out of necessity. I had a lot of raspberries, more than I could eat, and I needed to use them right away. The recipe below was the result. With a bit of tweaking, I was able to refine that original recipe to work for any variety of berries.
Homemade Berry Jam

Ingredients: Depending on the berries, it will make 3 to 6 4 oz. jars
- 4 ½ cups of berries of your choice
- 1 cup sugar
- 1 teaspoon lemon zest
- 3 tablespoons fresh lemon juice
- ¼ teaspoon salt
- ¼ cup water
Directions:
Place a small plate and spoon in the freezer. Sterilize 3 to 6 – 4 oz. jars, lids and bands and set aside.
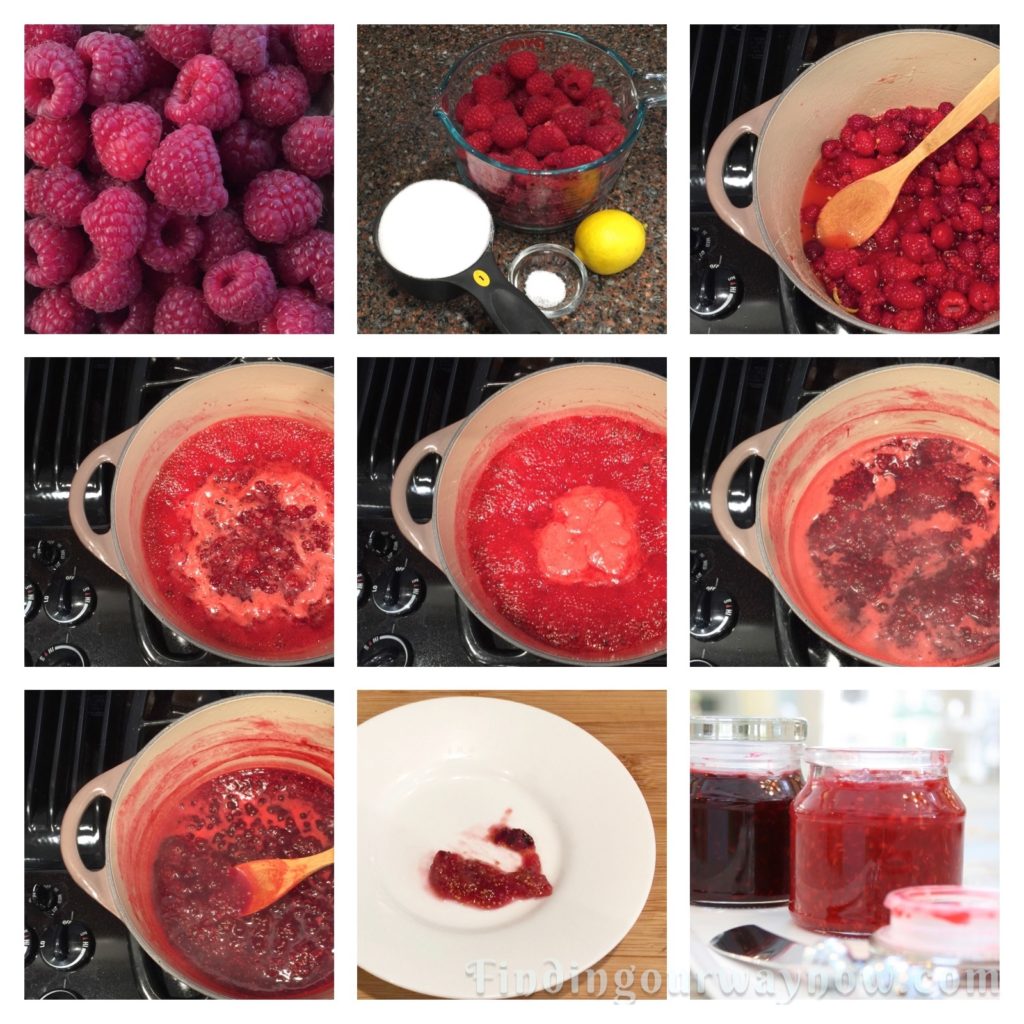
Combine the berries, water, sugar, salt, lemon zest and juice and bring to a rolling boil. Cook for 1-2 minutes, stirring continuously. Reduce the heat to medium-low, stirring occasionally, and cook for 10 minutes.
After 10 minutes start testing to see if it is done. Using the cold plate and spoon, place a small amount of the jam on the chilled plate. Put the dish back in the refrigerator for 1 minute. Tilt the plate to check for jelling/thickness; if it stays put or hardly moves, you’re good. One final test I do is to run my finger through the mixture. If it forms a firm line and crinkles a bit on the sides, it’s ready to jar. If neither occurs, clean the plate and spoon and place them back in the freezer and repeat this process every few minutes until you’ve reached a proper level of jelling/thickness.
With a canning funnel, pour the hot mixture into 3 or 6 4 oz. Freezer canning jars. Leave about ½ inch headspace at the top of each jar. Let the filled jar cool on the counter for 30 to 40 minutes. Once cooled, label, date and store in the refrigerator for up to a month or freeze for up to a year.

Notes: My jam recipe can easily be doubled or tripled using any berry variety or combination of berries. The amount of time it takes to reach the right thickness is not an exact science; it depends on the amount of moisture or lack thereof in the berries. If desired, mash the mixture a bit while it simmers to make the jam less chunky. For a little sweeter or tarter jam, add a bit more sugar or lemon juice or both. Be careful not to add too much of either. I prefer small, heavy sided jars that can be found online, at many grocery stores, or my favorite store, Cost Plus/World Market. One last thing, you may easily can these berry jams using the hot water bath method.
As you can see my homemade berry jam recipe is not complicated. It’s one of the many reasons I love it so. I especially enjoy the fresh, tart, fruit-forward taste my homemade berry jam imparts. Making small batches using 4 oz. jars makes an excellent presentation for the end product and for gift giving. Any of these jams are a splendid accompaniment to a good bread, homemade biscuits, scones or on a cheese board.
When you find that you have a significant amount of fruit on hand that needs a purpose, my homemade berry jam recipe is something you might want to consider.
Time to eat…
If you enjoyed my “Homemade Berry Jam,” check out my Homemade Peach Preserves, Fresh Fig Jam, and my Freezer Plum Jam. Enjoy.
P.S. Take a moment to check out some of the tools I used for this “Homemade Berry Jam” below.
